OPC-UA Example
OPC-UA is an industrial protocol, designed to make a unified method of exchanging industrial data between systems.
Most industrial recording systems support OPC-UA, along with a number of SCADA systems and HMIs.
It isn't often supported directly in a sites PLCs, but protocol converters such as those provided by RedLion allow you to read OPC-UA data and write it into a huge range of PLCs and other pieces of industrial hardware.
Viewing OPC-UA Data
There are a variety of OPC-UA clients available and several of them are free (although most require you register on the creators website).
We tend to use UAExpert by Unified Automation - it's free, simple and highly compatible with a wide range of systems.
Below is an example of connecting to a UA server…
Adding a Server
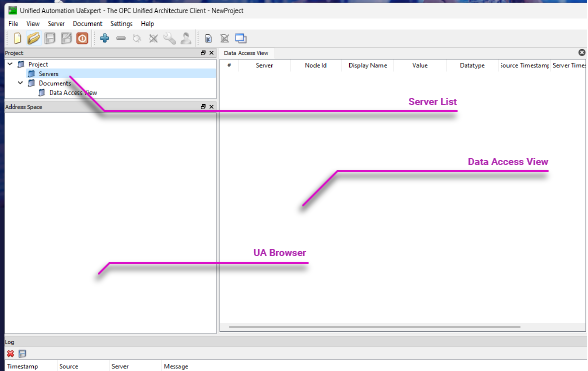
Right-click the Server List at the top-right and choose Add… from the pop-up menu.
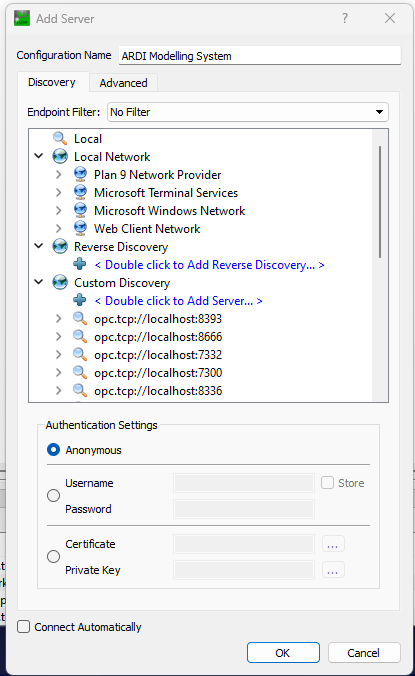
Double-click where it says 'Double-Click To Add Server'.
Enter the url in the form…
opc.tcp://<servername>:<portnumber>
For instance, if you're running an OPC-UA server on port 2244 on your local computer, you'd use localhost:2244 as the address.
This will add the server to the list but you'll still need to select how you'd like to connect to it.
Open the new entry in your server list and navigate through the options below it until you find the real OPC-UA server (a single server might have several different OPC-UA services, and each of those can have different connection methods and authorisation schemes).
When you've chosen the connection method and authentication you want to use (using the method marked as None - None is always simple - this means that you can connect without authentication), the window will close and the server will be added.
Connecting
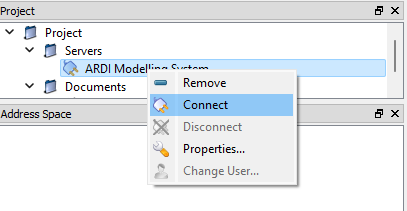
The server has been added, but we aren't connected.
Right-click the server and chose Connect to actually establish the connection.
Browsing for Points
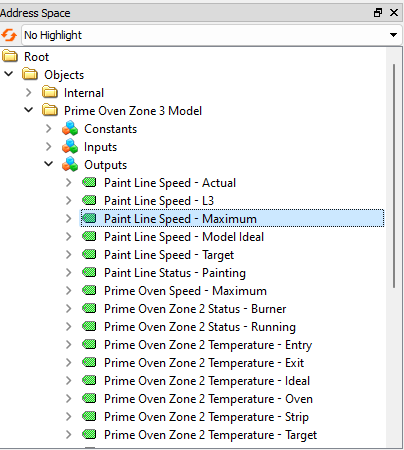
Once connected, the Address Space list will fill in with the content of the UA server. You can navigate through folders (yellow) and objects (boxes) until you find the individual tags (green) that represent specific points of data.
Drag these green tags over to the Data Access View to see the values. They'll update automatically as the data changes.


