Following / Filling In Checklists
Overall User Interface
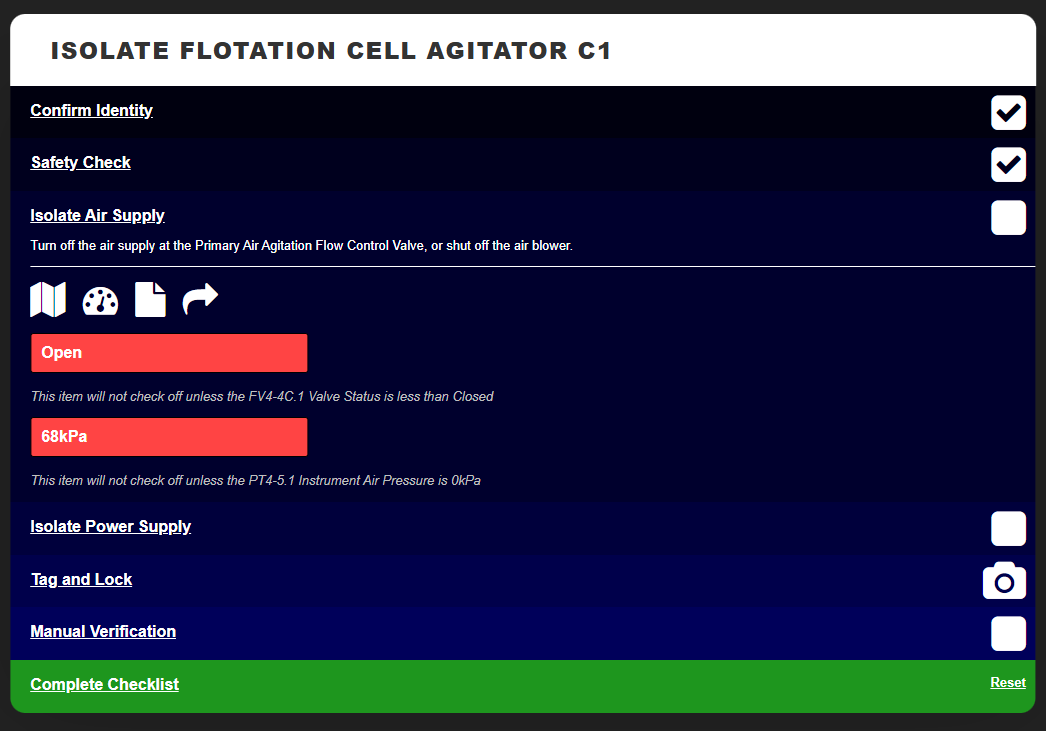
You'll find the name of the checklist at the top of the page.
At the bottom, you'll find the Complete Checklist button on the left, and the Reset button on the right.
The Reset button will erase all of your progress so far through the checklist, beginning the process again.
The Complete button will only submit the checklist once you've finished each of the steps.
Individual Steps
Each step of the process has some elements in common.
On the left, you'll find the name and description of the step. This might optionally include other details, such as documentation, pictures, links to dashboards, history etc.
On the right will be the checkbox itself. You click on the checkbox to confirm that you've completed the step.
There are three different styles of checkbox -
| Type | Meaning |
|---|---|
| Solid White | Unchecked - this step has not been completed yet |
| Checkmark | Checked - this step has been completed |
| Camera | Requires Photograph - you need to submit a photograph to continue |
Validated Steps
Some steps - like the step in the image above - include validation. This step uses feedback data from your system to verify that you've successfully and correctly completed the task.
When these boxes are red, the condition hasn't been met yet and you can not complete the step.
When the boxes are green, the condition has been met and you can continue.
Form Steps
Some steps ask you to enter one or more pieces of information.
This records your feedback, such as…
- The condition of a piece of equipment,
- Manual measurements, such as vibration or temperature,
- Readings from mechanical sensors such as gauges and indicators
Some types of feedback are optional (you can continue leaving them blank), while some are required in order to continue the process.
Submitting
When you've completed each step, please remember to press Complete Checklist.
